Windows
Install Ryujinx Canary on Windows
Most Windows PCs and handhelds use the x64 package. Extract to a normal folder, launch Ryujinx.exe, and continue with first-time setup.
Quick checklist
- 1. Download the Windows x64 `.zip` or `.7z` package from the release assets.
- 2. Extract it to a short, writable path such as `C:\Tools\Ryujinx` instead of a protected system folder.
- 3. Run `Ryujinx.exe`. If Windows SmartScreen appears, only choose More info then Run anyway when you trust the official source.
- 4. If Ryujinx asks for .NET Desktop Runtime, install the matching runtime from Microsoft and launch again.
- 5. Continue with keys, firmware, game folders, input, and graphics on the setup guide.
Step-by-step Windows tutorial
Extract the downloaded archive
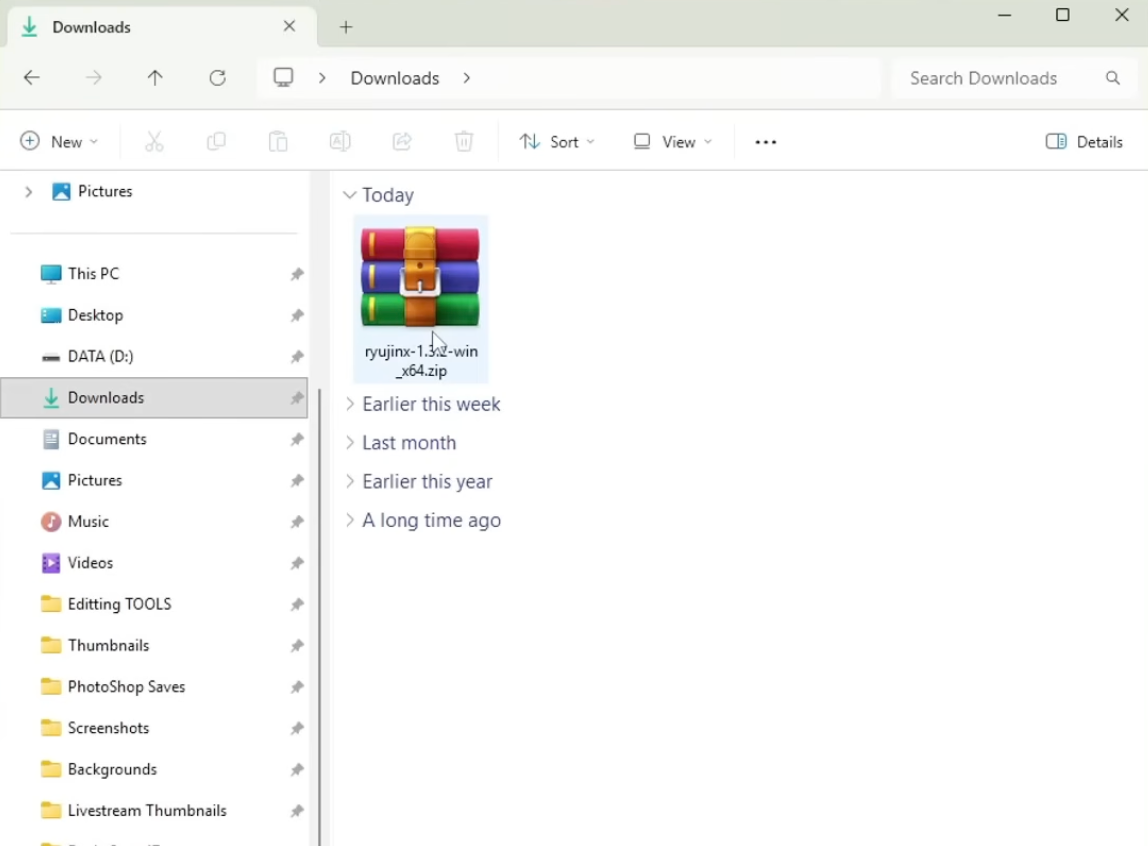
After the download finishes, you will usually have a compressed archive such as a .zip or .7z file. Use an extraction tool like 7-Zip to unpack it into a normal folder you can access easily.
Open Ryujinx.exe
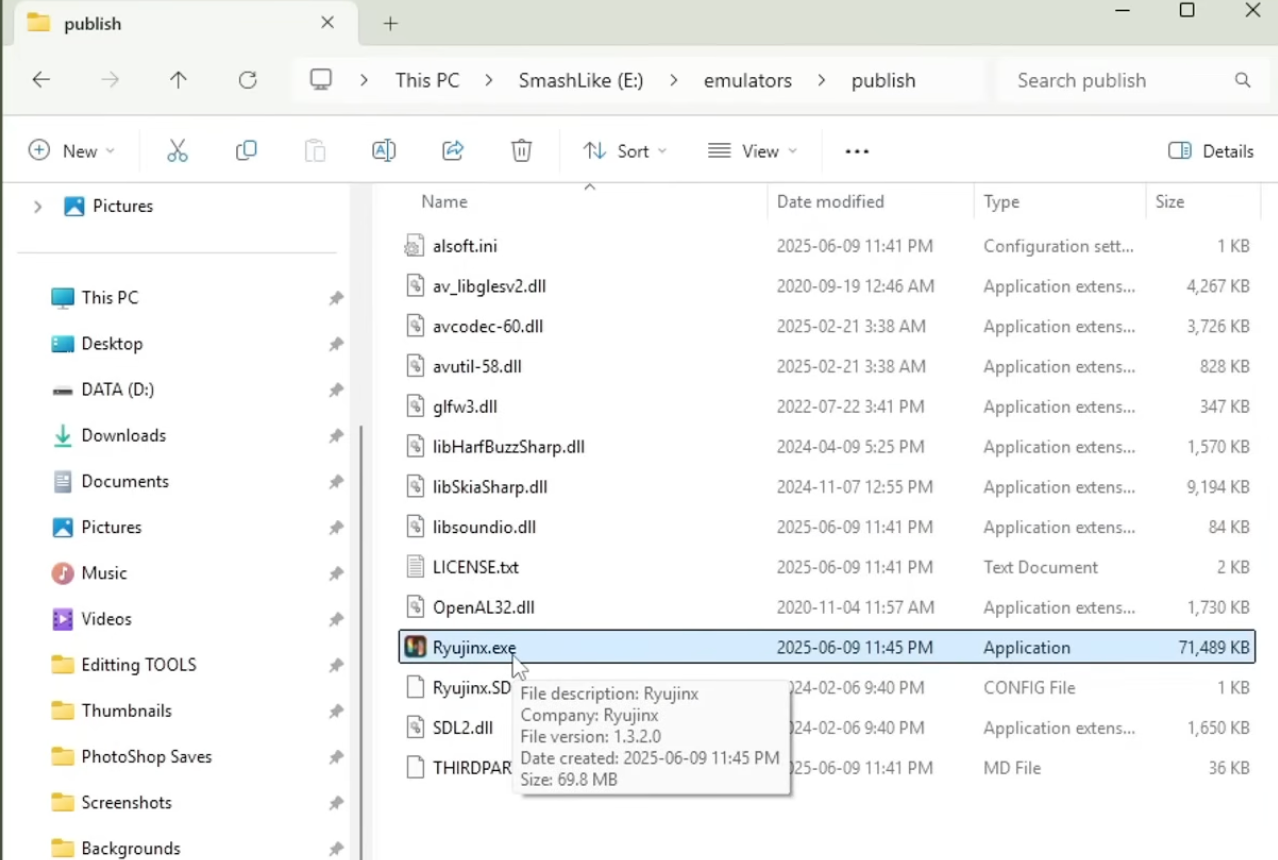
Open the extracted folder and double-click `Ryujinx.exe` to launch the emulator. If SmartScreen appears, only continue when the file came from the official release source.
Open the Install Keys menu
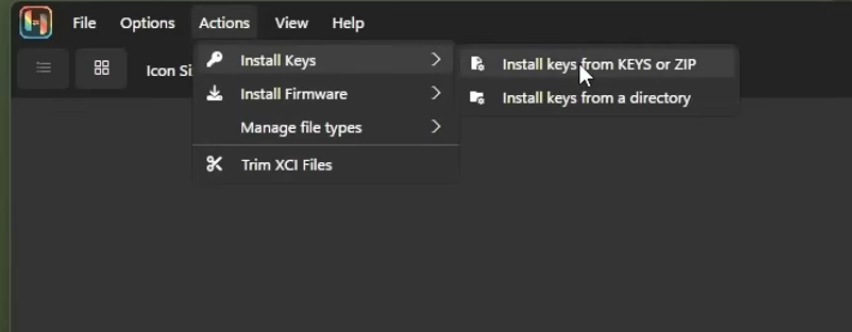
Inside Ryujinx, open `Actions` and choose `Install Keys`, then select the option to install keys from a KEYS file or ZIP archive.
Choose your keys file
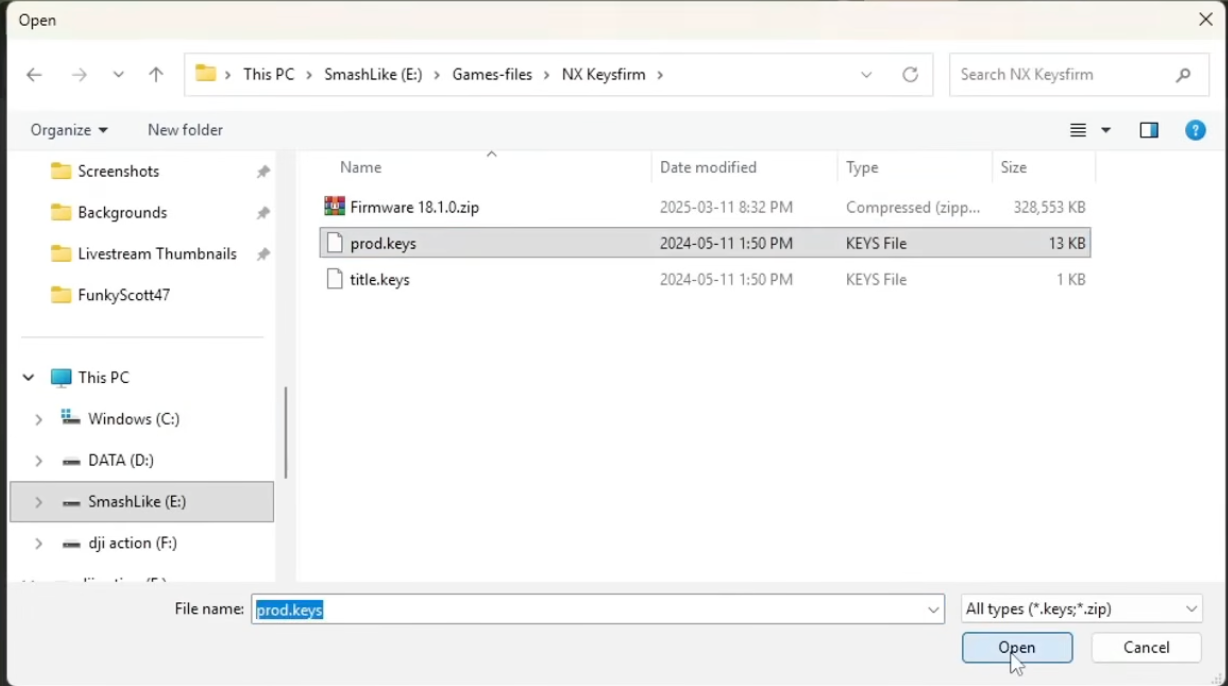
Select the correct keys file such as `prod.keys`, then confirm the selection. Keys are required because they allow Ryujinx to decrypt game content that your own legally dumped files use.
Open the Install Firmware menu
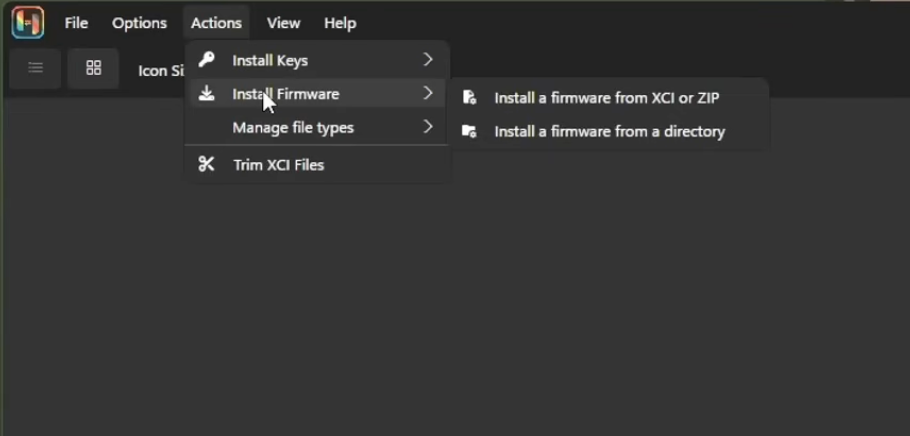
After the keys are installed, open `Actions` again and choose `Install Firmware`, then select the option to install firmware from an XCI or ZIP file.
Select the firmware package
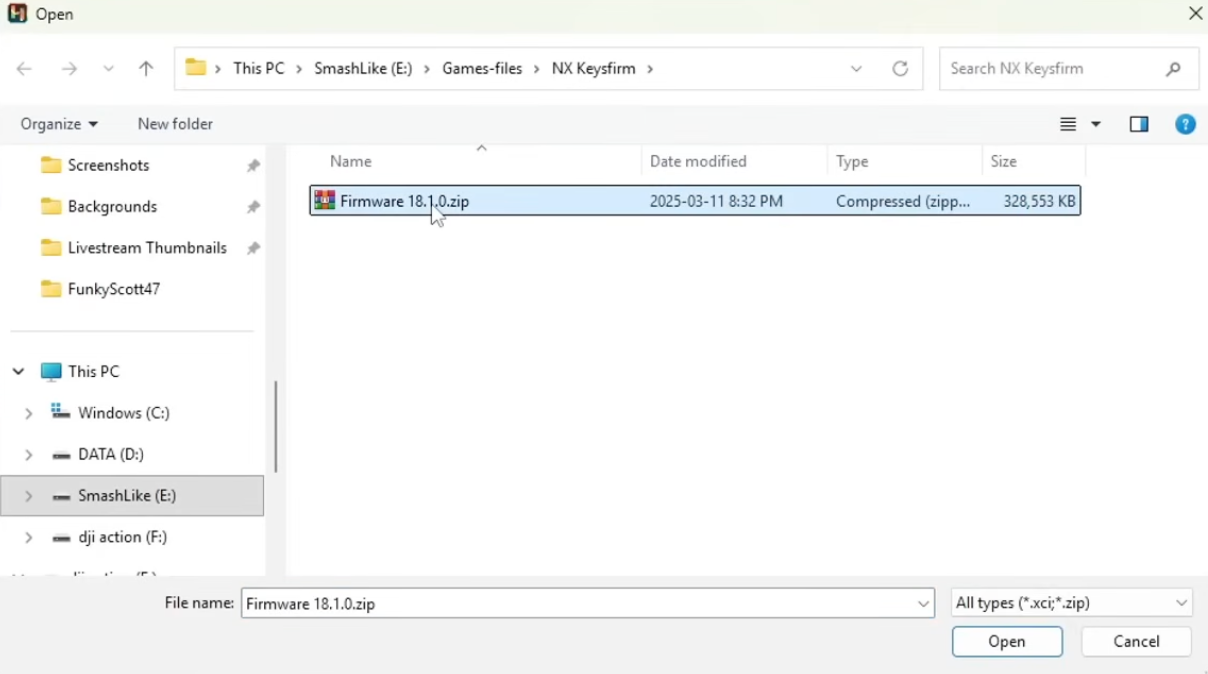
Choose your firmware archive and continue. Once firmware is installed, you can move on to adding game folders, configuring controls, and testing your first game.
Open Settings
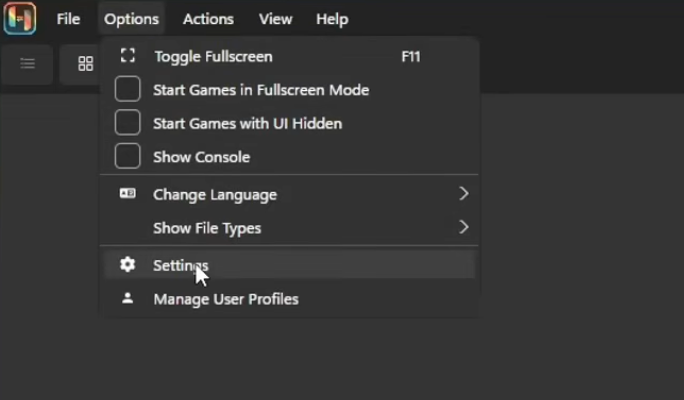
Open `Options` and choose `Settings` so you can tell Ryujinx where your games are stored.
Add your game directory
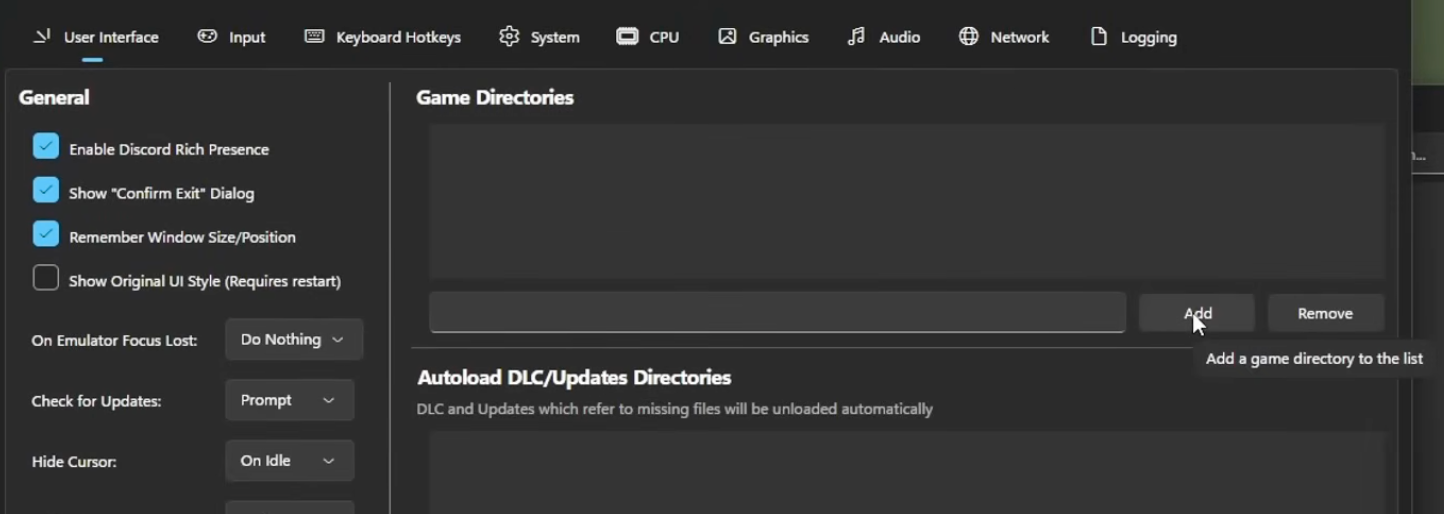
In the `Game Directories` section, click `Add` and choose the folder that contains your game files. Ryujinx will scan that directory and list supported games from it.
See your games in the library
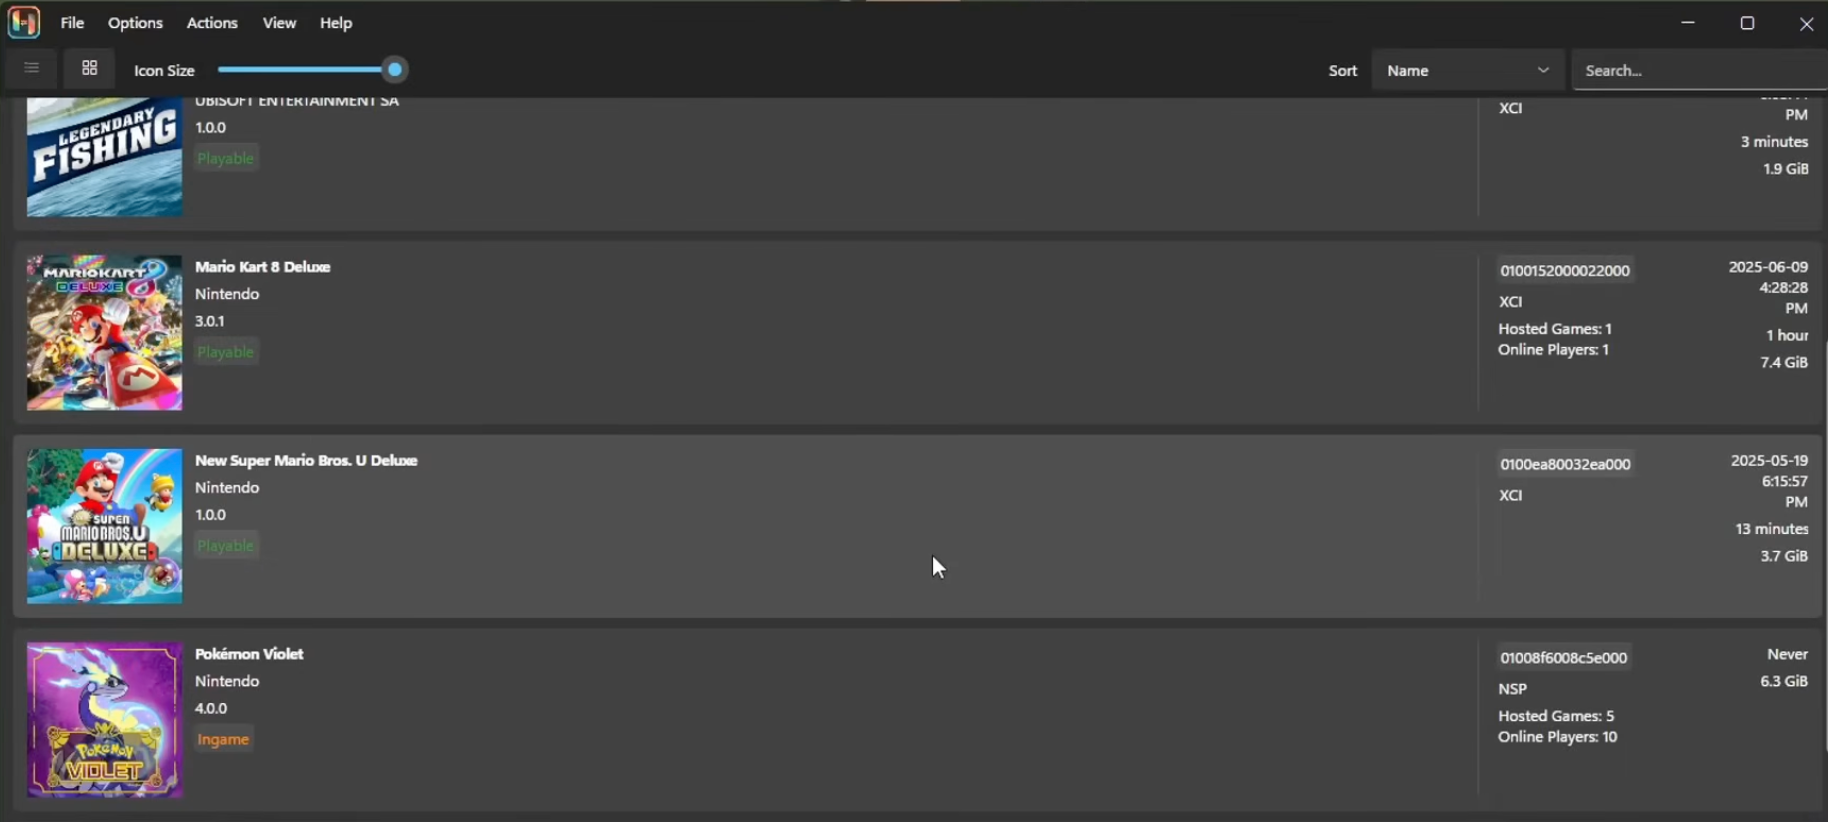
After the folder is added, your own games should appear in the main Ryujinx library. At that point you can pick a title, adjust controls or graphics if needed, and start playing.
Add DLC and update folders the same way
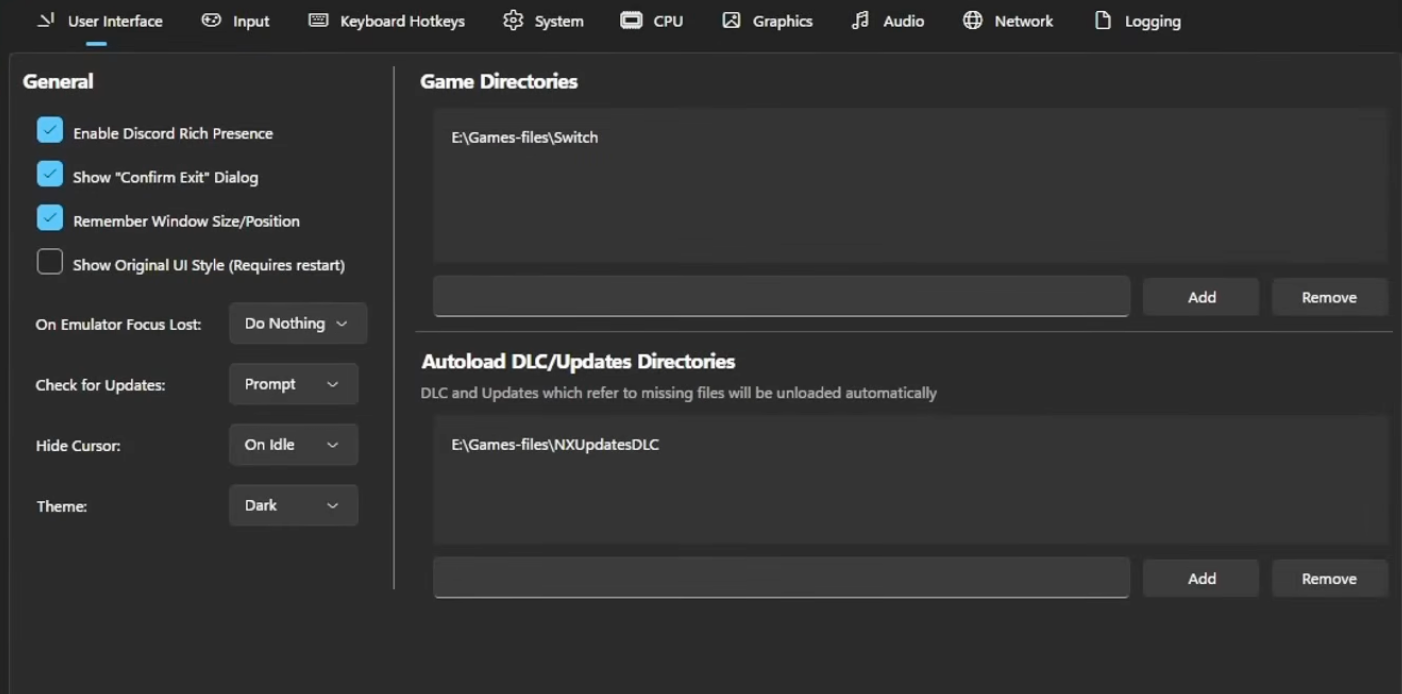
If you also have DLC or update files, open `Settings` again and use the `Autoload DLC/Updates Directories` section the same way. Add the folder that stores your DLC and update content so Ryujinx can load it automatically when the related game is missing those files.
Share this Ryujinx Canary guide
Help others find safe downloads, install notes, setup steps, and troubleshooting tips.